Use a Moment in a post
A saved Moment is just data until you plug it into something. Once you attach it to a piece of content, the AI regenerates the post with the actual photo, the actual context, the actual date. That's when a generic post becomes a post that could only be from your brand.
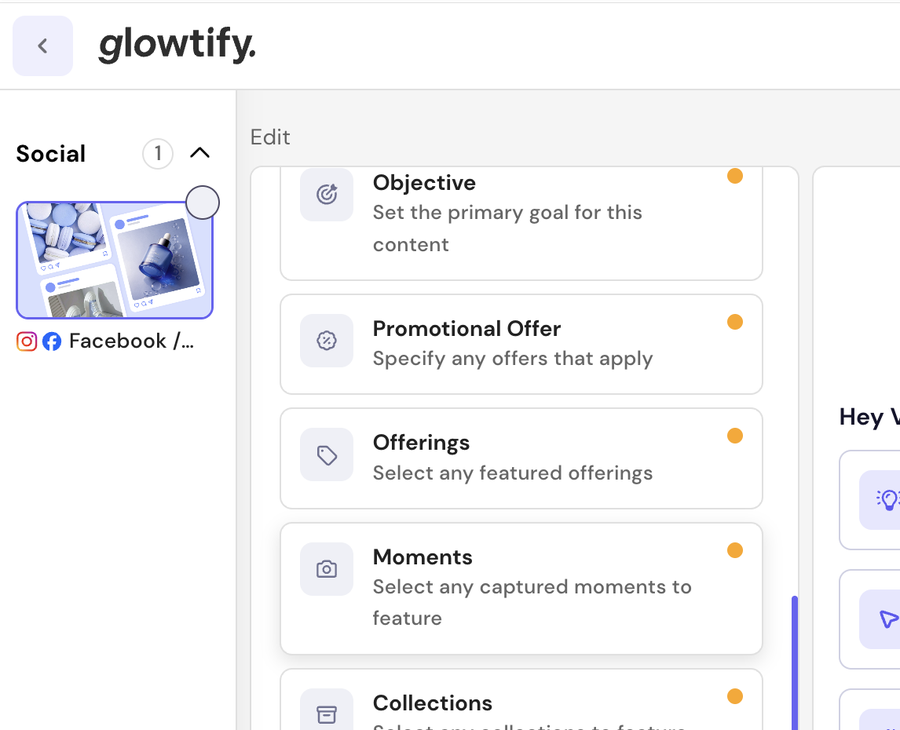
Moments are attached to content as power-ups, alongside Offerings, Collections, and the rest.
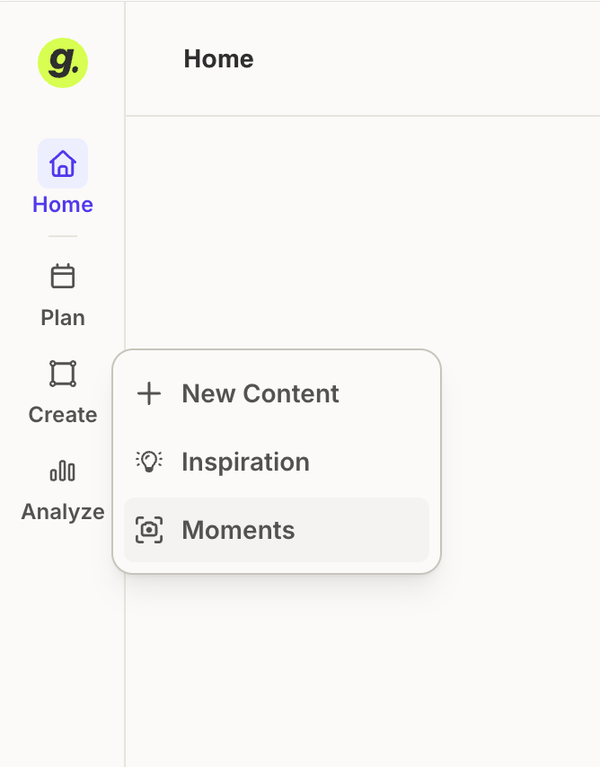
Find your Moments on desktop
Every Moment captured on any team member's phone lands on the desktop app. Open the sidebar → Content planning section → Moments. Direct URL: /moments.
Browse and filter the list
The Moments page lists everything the team has captured. Filters at the top let you narrow it down:
- Search — free text across titles and descriptions
- Status — Requested / Draft / Pending / Used
- Member — who captured it
- Assignee — who it's assigned to
- Source — Mobile or Desktop
- Date range
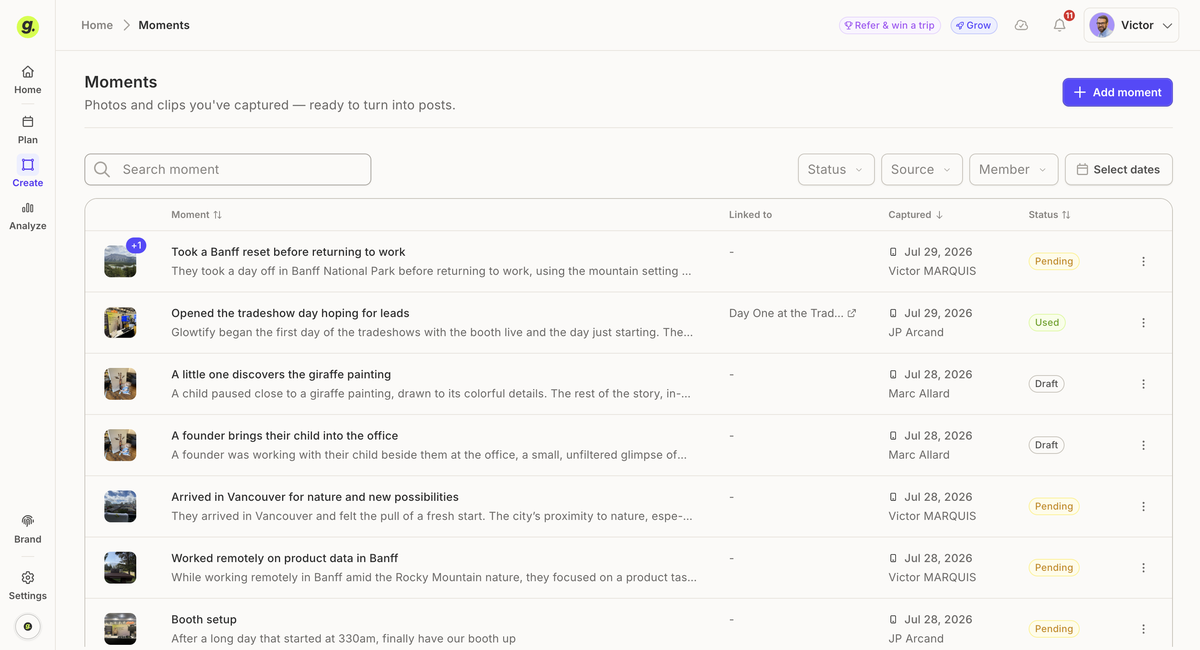
The Source filter is useful for splitting field captures (Mobile) from things uploaded from the office (Desktop). The Assignee filter answers "what's on my plate?" if you're the one who's supposed to use the Moment in content.
Attach a Moment to a piece of content
- Open any content in edit mode — a Meta post, a story, a LinkedIn post, an email, an ad
- In the Power-ups panel on the right, click Moments
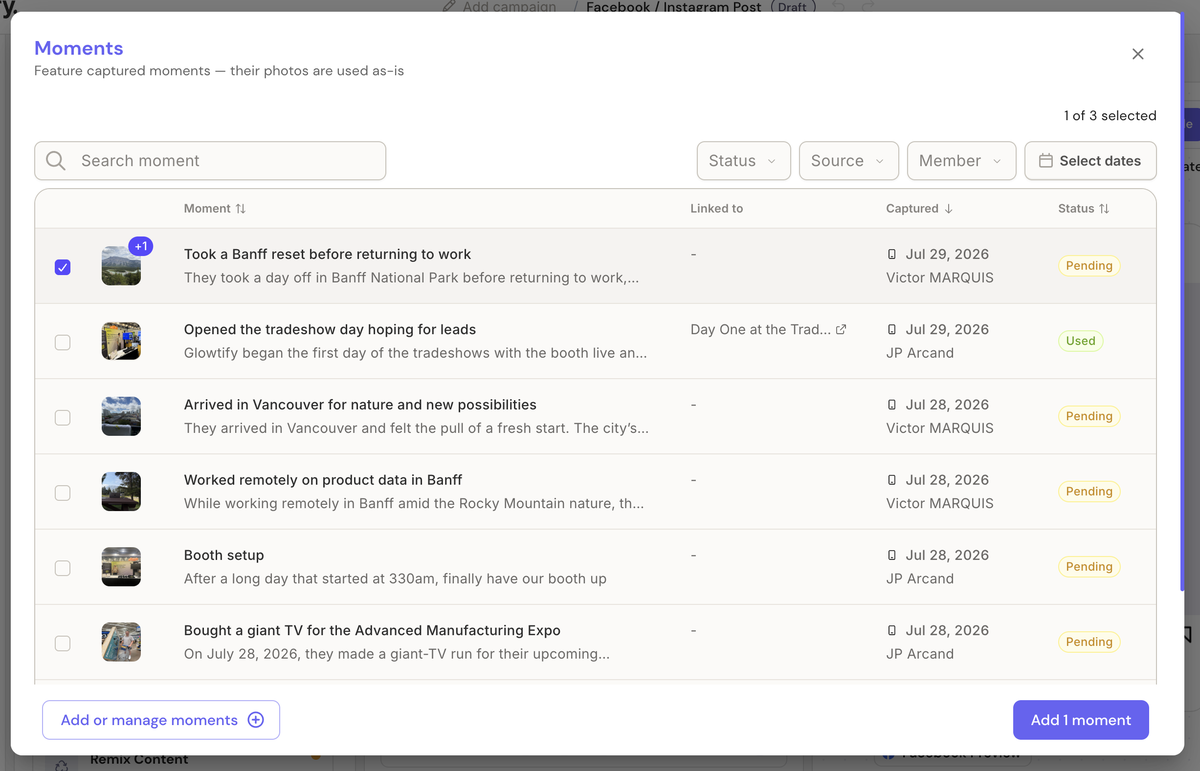
- The Moments picker opens. Filter or search until you find the Moment(s) you want. Pick up to 3 — any more and the AI loses focus.
-
Click Add moments. The picker closes and the Moments show up in the power-up panel.
-
Regenerate the content from the chat. Type something like "Regenerate using the Moments I just added." The AI now writes the post using the actual photos and context.
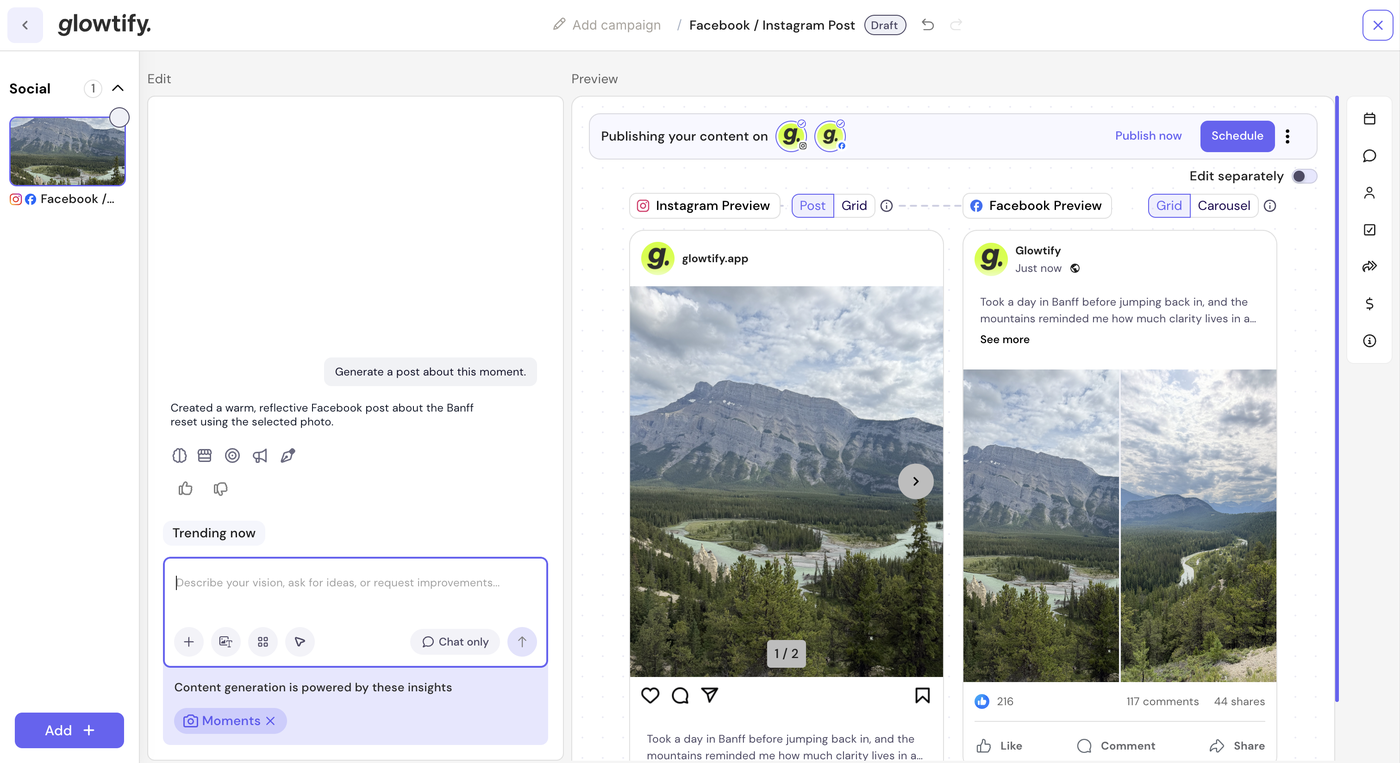
- Preview on the target channel (Instagram, Facebook, LinkedIn…). Adjust the caption or the crop if needed. Publish or schedule.
Why the 3-Moment cap
More is not better. Past three Moments in one power-up, the AI starts blending stories that shouldn't be blended, and the caption drifts into generic. Three narrow Moments produce a much sharper post than ten loosely-related ones.
If you have more Moments to use, split them into several posts. The Planner Chat can help you sequence them.
The status shifts to "Used"
Once you attach a Moment to a published post, its status flips from Pending to Used in the list, and you can filter for it. Two goals:
- Avoid using the same Moment three times across three posts without noticing
- Track which captured Moments actually make it into content (a rough activation metric for the field team)
You can still reuse a Used Moment — the status is a signal, not a lock.
Related articles
- Create a Moment — the capture side
- Request a Moment from a teammate — when you know the visual you need but don't have it yet
- Create a Meta post — the flow you'd typically attach a Moment to